Basic Web Skills: Setting Up Burp Suite
In the previous Dev Tools post, we covered basic ways to inspect page source, requests, cookies, and other webpage information. But there were some things pretty noticeably absent: how do you easily modify requests? You could use cURL, but wouldn’t it be nice to see history of requests and have some built-in scripting capabilities?
This is where Burp Suite comes in.
This post covers basic Burp Suite setup (for the free, Community edition), plus how you can use it for the web app testing functionality we covered in the Dev Tools post.
What is Burp Suite (and why should I use it?)
As we’ve already hinted at, Burp Suite is a sort of Dev Tools on steroids. It’s a suite of web app tools that intercepts traffic and lets you inspect it, modify it, and even automate your testing. The professional version of Burp has active scanner capabilities (among other things), and there are add-ons available too.
But you don’t need to be a professional or have a ton of add-ons to get value from it. Being able to easily see and modify requests, and automate/create new requests will be a big help to you as a newbie, too.
As with most GUI-based tools, you won’t always be able to use them (for example, if you are limited to command-line tools on a server you are testing). So it’s still important to know the basics, like cURL, netcat, etc., but where and when you are able to make your life and job easier, you probably should do so. 🙂
How to Install
Burp Suite functions by intercepting traffic for inspection and/or modification before forwarding it on. That means you need to proxy the traffic to Burp. More to the point, it means you need to set up two things for Burp to work.
Part 1: Download Community Edition
First, let’s download Burp Suite Community Edition and install it. You can do that here, on Portswigger’s website.

The next page will let you choose from MacOS, Linux, Windows, and a standalone JAR file.
Part 1b: Adding Burp’s Certificate
You’ll need to install Burp’s CA cert so that you don’t get a TLS warning while you’re testing. Portswigger has a guide for each browser:
Part 2: Proxy
You need a way to direct the traffic to Burp Suite. You could do this by proxying your traffic through browser settings, such as the Firefox Network Settings window shown below, but it’s cumbersome to turn it on and off (since you probably don’t want to proxy all your traffic, all the time).
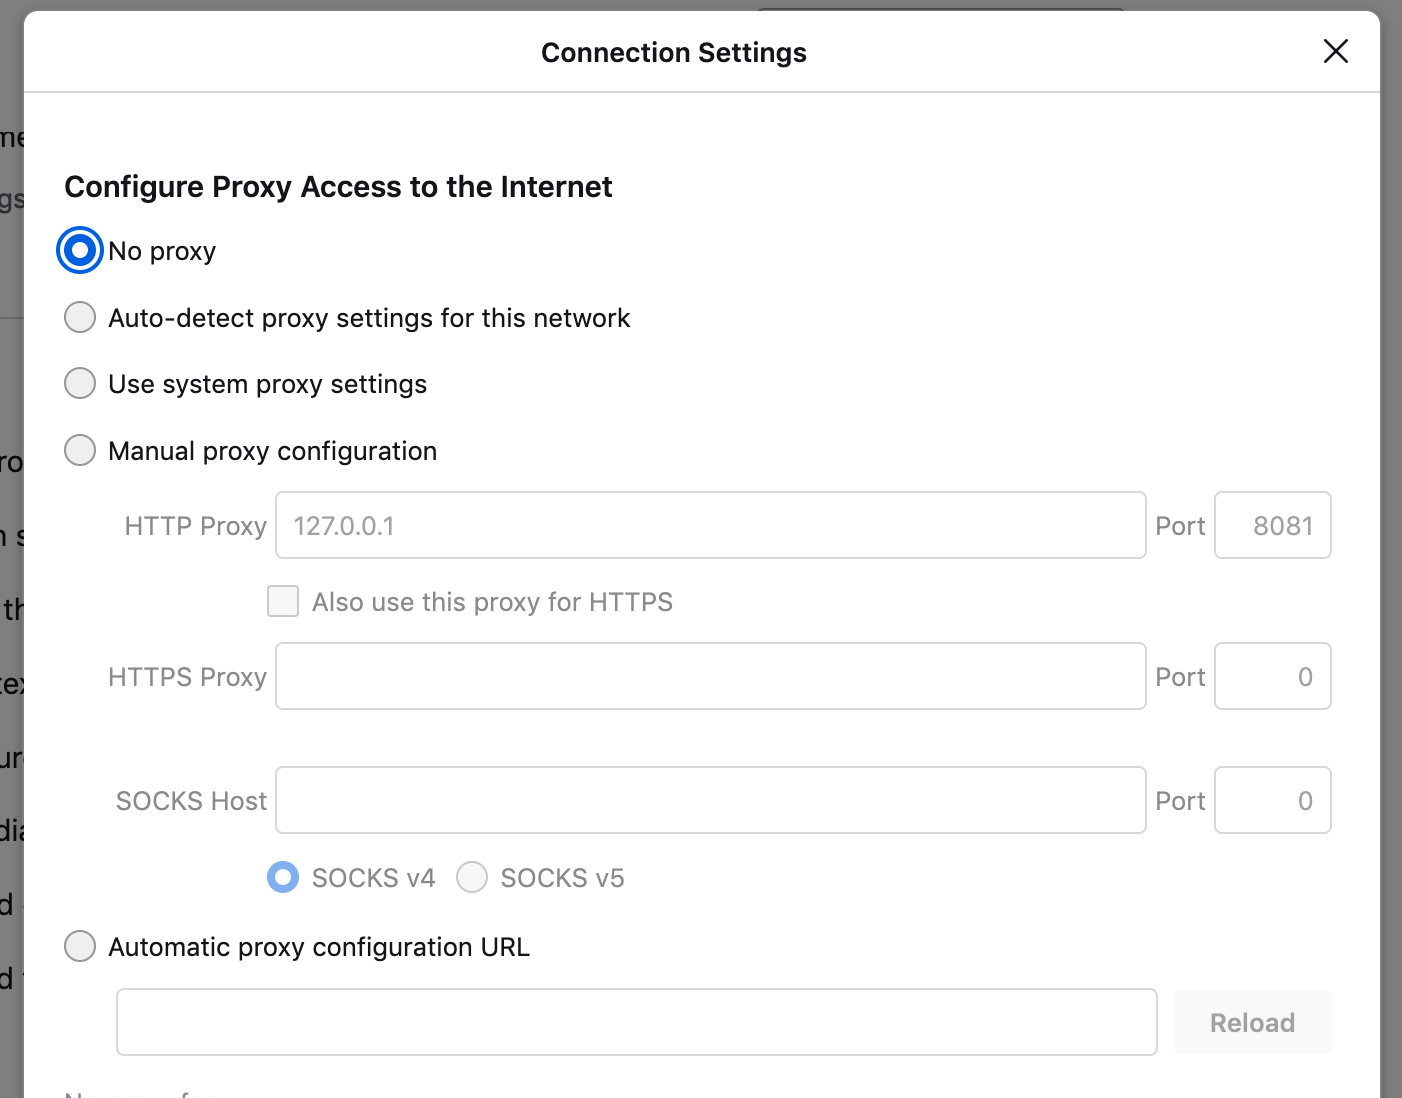
Instead, let’s install a proxy browser plugin so you can easily turn the proxy on and off (on while you’re using Burp, off otherwise).
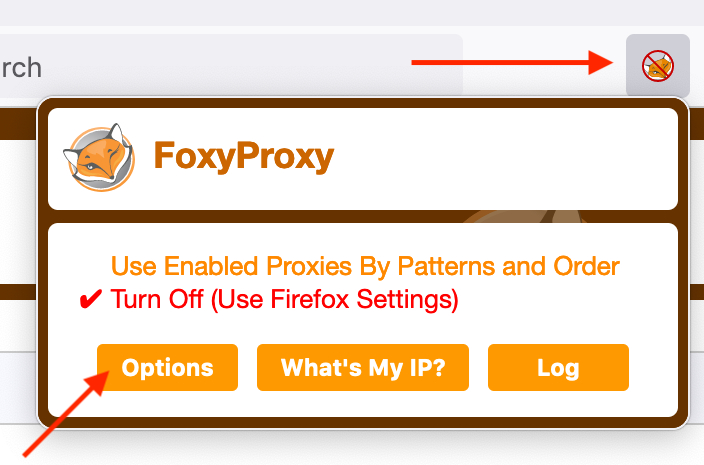
I like to use FoxyProxy but there are several options. Install the correct option for your browser of choice (Google search “foxyproxy chrome” to find the Chrome plugin, for example).
Then, click the browser icon, and click Options.
A new tab will open up, and from there, click Add. This will let you add a new proxy profile (so you can make multiple profiles if desired). Name it something obvious like “Burp Suite” and set the IP address to 127.0.0.1 and the port to 8080.
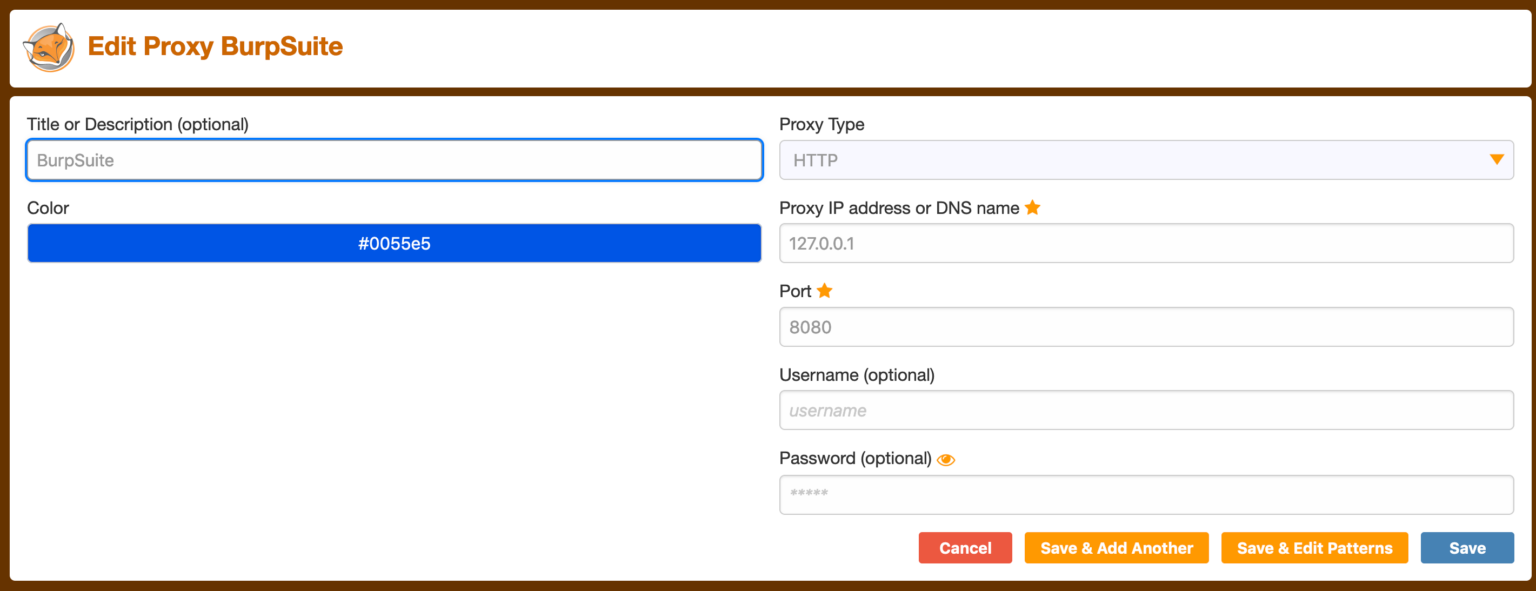
Click Save.
Then, click the icon again and select the newly-added Burp Suite proxy profile.
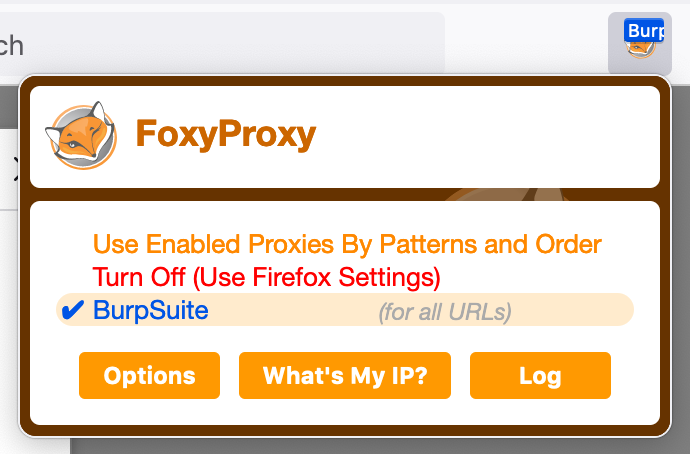
Whenever you have the "Burp Suite" profile selected within FoxyProxy, your traffic will be proxied to Burp Suite--or rather, to where it thinks Burp Suite is listening.
Turning off the proxy is as simple as selecting the "Turn Off" option (but your settings are all saved for next time).
Part 3: Try it out together
At this point, you have Burp Suite installed, the CA cert set up, the browser proxy plugin installed, and configured to proxy traffic.
And, the FoxyProxy (or whatever plugin you’re using) proxy is now on, so if you try to navigate to, say, Google, the page will never load.
One more step, and you should be all set to use Burp.
If you don’t already have Burp Suite open, do so now.
If you have the Community (free) version, you won’t have any options in the initial set up. Just click through to say yes, you want a temporary project, and use the default settings for now.

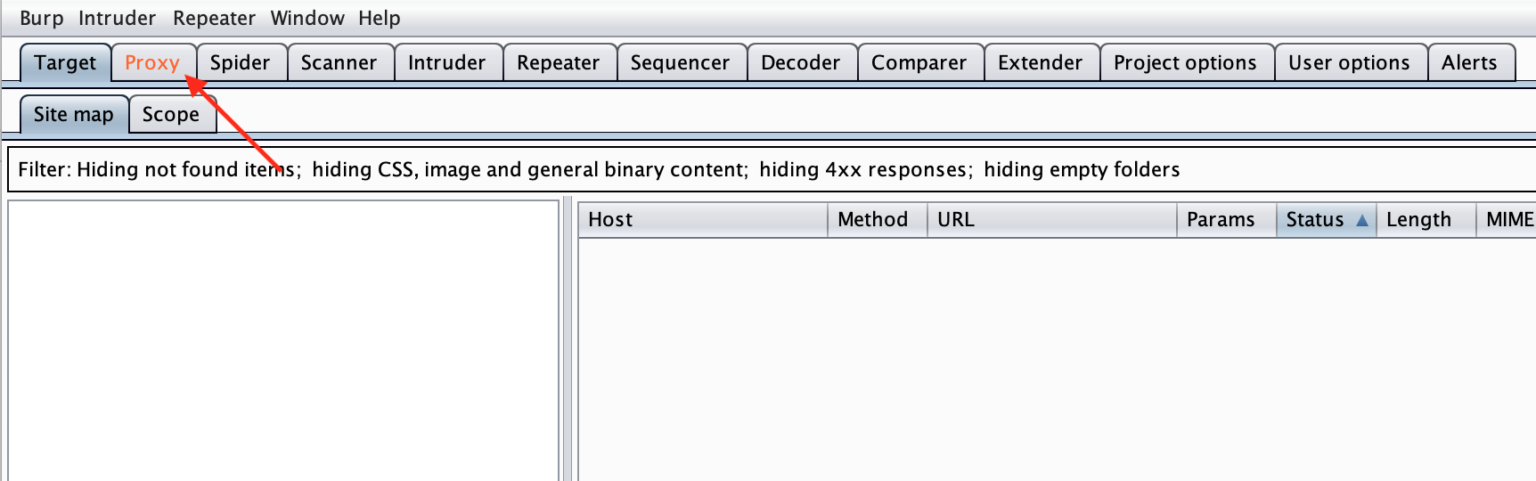
You’ll see the Proxy tab “light up” (turn orange). Click this tab.
Then you’ll see the request you made (to Google). Burp is waiting for you to Forward the request, which is why it’s not loading in your browser. You can leave this feature on, but you’ll find yourself having to forward dozens or hundreds of requests just to view a web page. So for now, let’s turn it off.
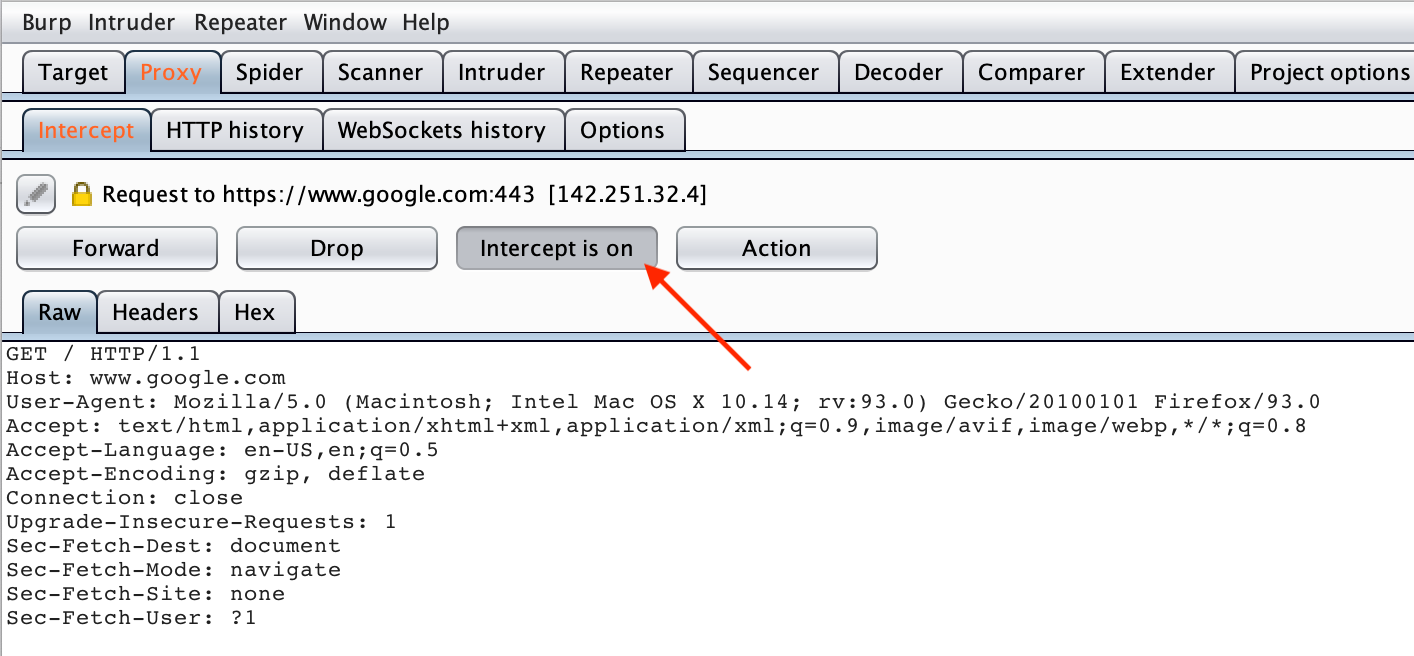
As soon as you click “Intercept is On” it should toggle to say “Intercept is Off” and the page in your browser should load. If all of that happened, congrats, you’ve got Burp Suite set up and you’re ready to go!
Note: If you used a port number besides 8080 in the earlier setup, you’ll need to go into the Proxy > Options tab to change the proxy settings.
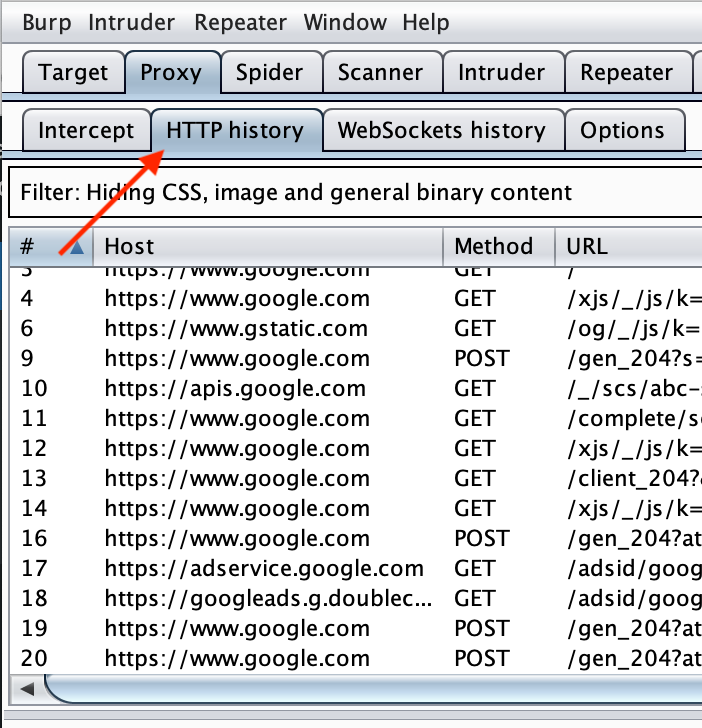
If you do a Google search or other browsing (using the browser that has FoxyProxy enabled), you should see those requests show up in the HTTP History tab under Proxy.
A crash course in Burp Suite tools
To send requests between different parts of Burp Suite, right-click the request and say Send to ... Then, the receiving tab will light up. Click it, and then continue on with your testing. 🙂
Burp Suite Target
This tab shows you a high-level overview of all traffic collected by Burp Suite (for a given project).
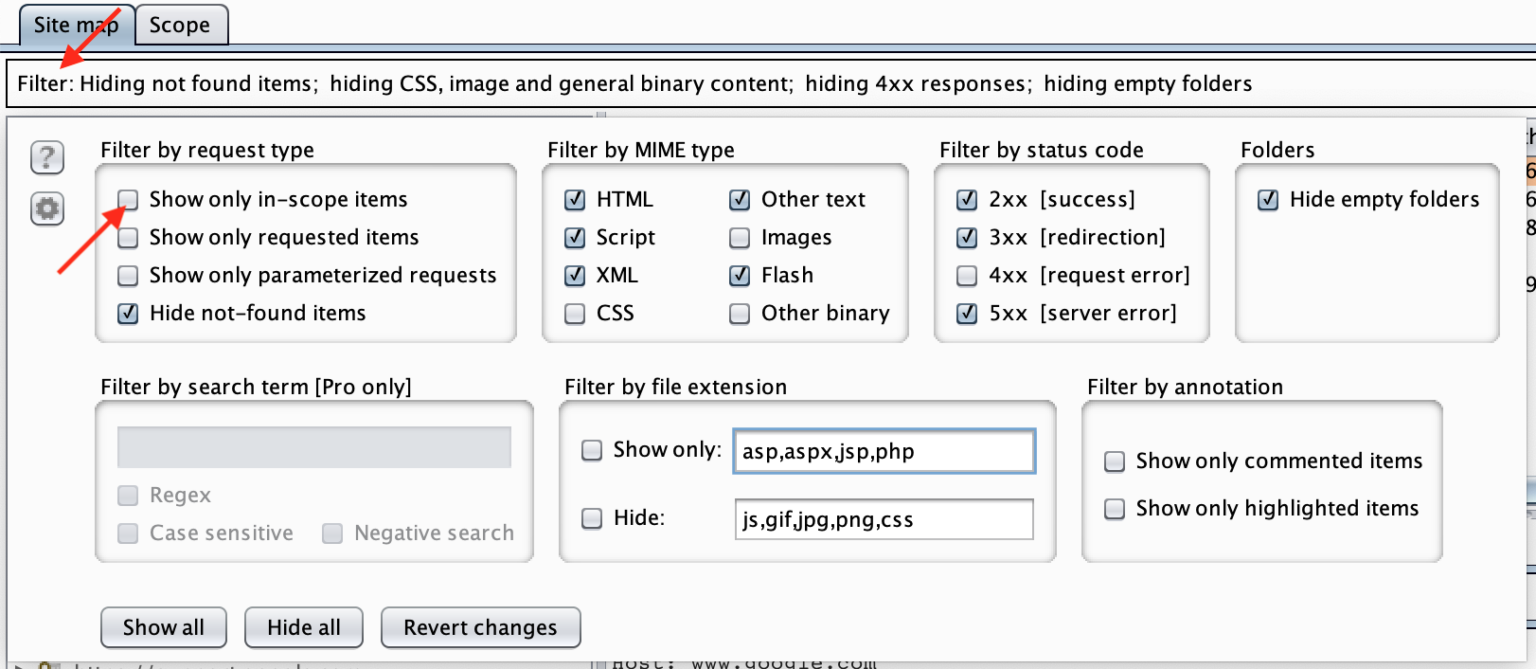
You can also click “Scope” and add in scope. This lets you set which domains, subdomains, etc. are in-scope. Then, you can instruct Burp Suite not to display and/or not to collect history on domains that are (implicitly or explicitly) out-of-scope.
To do so, click the Filter: ... bar on each page, below the second set of tabs, and click Show only in-scope items.
Burp Suite Proxy
We’ve sort-of already covered this. Proxy shows you chronological history of your browsing; the ability to intercept requests one-by-one; and the options tab. I’ll cover this more in a later post, but you can use this tab to (for example) programmatically ignore 302 redirects, and other useful web testing tricks.
Burp Suite Spider
This will crawl a given website using the options selected in the Options tab. By “crawl” I mean it will check robots.txt, and will also programmatically find links on pages, navigate to them, and repeat the process. You shouldn’t use this one without a scope defined, in my opinion.
Burp Suite Scanner
The (active) scanner is a paid part of Burp Suite, so you need a professional Burp license to use this.
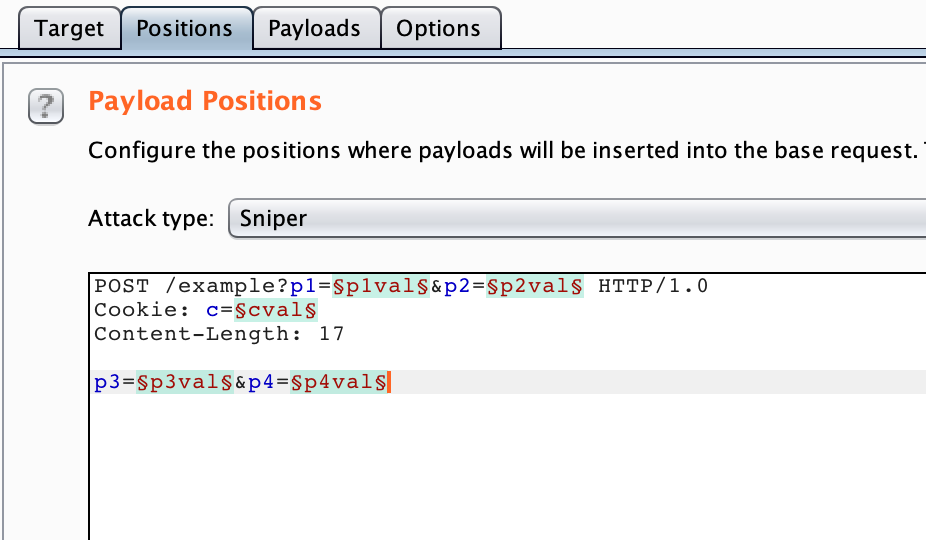
Burp Suite Intruder
This is essentially a scripting tool, although the free version of Burp Suite significantly throttles the speed of the Intruder functionality. Burp Suite Intruder works by letting you define variables within a request (designated between § symbols), and then selecting a payload list. Intruder will set the variables to the payload values you specified, one at a time, and record the results.
You could use this for (very slow) brute-forcing of usernames and passwords; API endpoint fuzzing, or IDOR attacks. If you’re on the free version of Burp, this is going to be slow/throttled, so there are other tools you can use. But it’s worth trying out if you’re to Burp. For example, the “Cookies” web challenge on PicoCTF would make great use of this functionality.
Burp Suite Repeater
The repeater is probably my favorite tool. To use it, find a request elsewhere in Burp (such as on the HTTP History view within Proxy), right click, and say Send to Repeater.
Then, the Repeater tab will light up. From here, you can modify any part of the request. Instead of using cURL to change headers, you can do so with a GUI view.
For example, you can change a request type from GET to POST. You can change the user-agent, host, cookie values, and so on. It’s also very helpful for sending data (no more trying to escape quotes within cURL), and various payloads. This is especially useful since the response is displayed to you within Burp Suite, whether as raw HTML or as a rendered web page.
Test this out with the “aHEAD” web challenge on PicoCTF.
Try It Out
The best place to test this stuff out is through PortSwigger’s Academy. There are paid labs but there are also a number of free ones to get you started.
You can also try the previously mentioned PicoCTF challenges: aHEAD and Cookies.